
What is graphic design?
Graphic design focuses on creating visuals to convey a message or story. Read on to learn about graphic design and how Figma can help.
Skip to main content
Building with AI
Open almost any app and tweening is already at work: a menu unfolding, an icon bouncing back after a tap, a hover state fading from one color to the next. Each of those movements has a defined start and a defined end, and tweening generates the frames that connect them.
Animators have been doing it by hand for decades, but design software has since automated most of the math. These days, you can set two points on a timeline, then let the software fill in the middle.
Read on to learn:
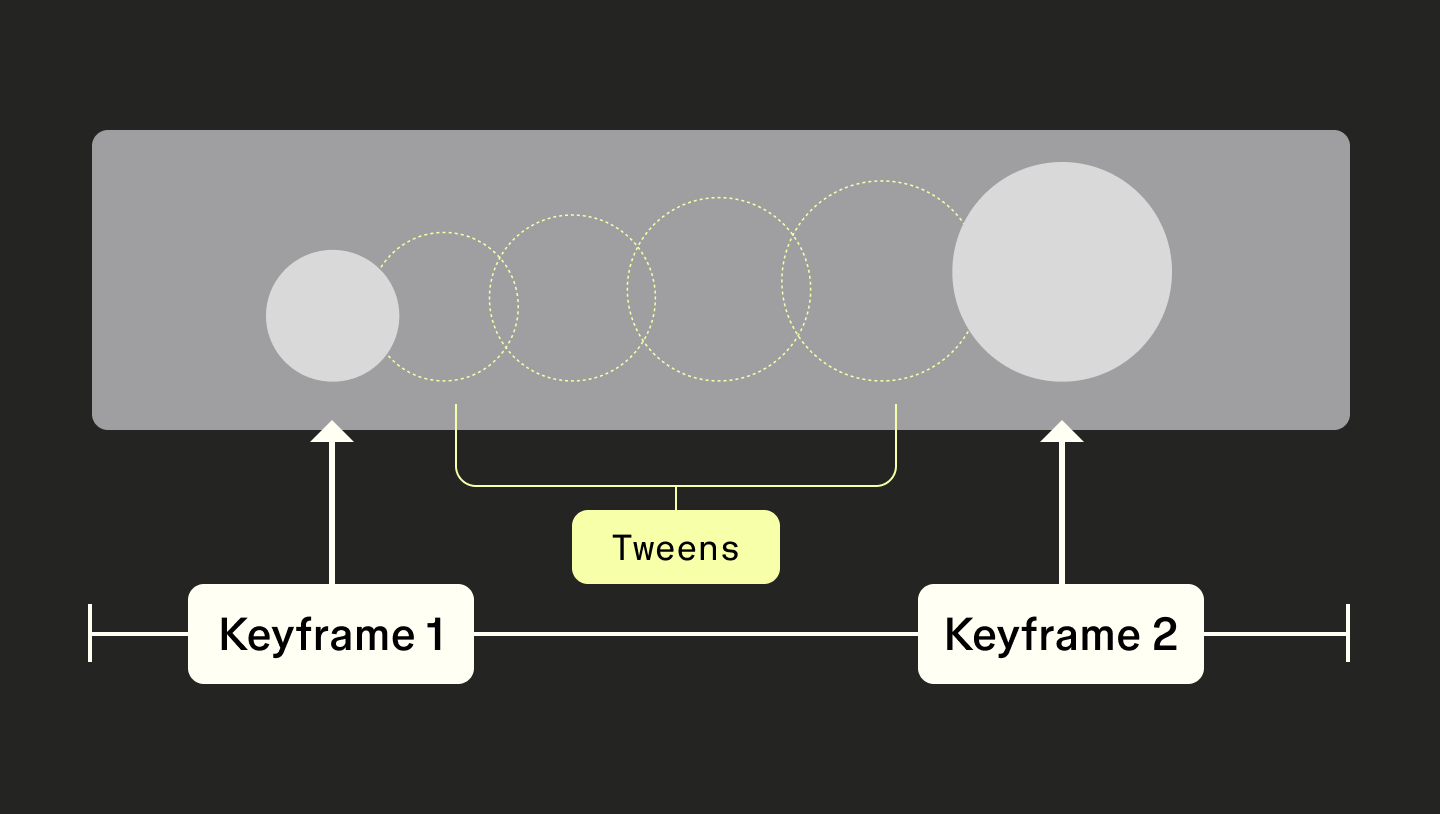
“Tweening” is short for “inbetweening” and refers to the process of making the frames that sit between two keyframes in an animated sequence. The goal is to smooth out how a subject’s position, shape, size, or color changes.
Without tweening, animation would look like a slideshow. With it, motion reads as continuous, even though a computer or an animator is still producing a series of still images.
The term comes from hand-drawn animation, where an assistant called an inbetweener filled in every frame between a lead animator’s key poses. Software eventually took over the job, calculating those frames in a fraction of the time.
A keyframe is a position or state that an animator sets directly. Every tween needs at least one beginning and one ending keyframe so that there’s something to interpolate between.
More complex animations often string several keyframes together, with a tween filling each gap. A character mid-jump might have a keyframe for the crouch, one for the peak of the jump, and one for the landing, with tweened frames smoothing each transition in between.
Tweening happens in one of two ways.
Traditional tweening was manual. Assistant animators would hand-draw every in-between frame based on the lead animator’s keyframes, often checking their work against a light table. The slow, skilled work was a big reason why full animation was so expensive to produce.
Digital tweening automates most of the math. The keyframe animation engines built into modern motion and design software calculate the intermediate values between a start and end keyframe on their own. For example, say an object sits at x = 0 in frame 1 and x = 100 in frame 10. The software generates every in-between position automatically, without an animator plotting each one by hand.
Easing determines how a tween feels, beyond where it ends up.
Most professional easing animation combines the two, so an element accelerates from its starting point and decelerates toward its ending point.
A perfectly linear tween, one with no easing at all, looks robotic because real-world objects rarely move at a constant speed. Easing curves control that acceleration and deceleration so motion reads as natural rather than mechanical, which is why they show up in everything from a bouncing icon to a full character animation.
Most tweening falls into a handful of categories, and knowing the difference helps you name what you need before you open any software.
| Type of tweening | What it does | Example |
|---|---|---|
| Motion tweening | Moves an object or symbol from one position to another across frames | A button sliding into view on a screen |
| Shape tweening (morphing) | Transforms one distinct shape into another over a series of frames, making the change feel deliberate instead of jarring | A logo morphing from one mark into another |
| Scale and rotation tweening | Resizes or rotates an element smoothly instead of snapping to a new size or angle | An icon scaling up when someone taps it |
| Opacity and color tweening | Fades an element in or out, or shifts its color over time | A hover state fading between two colors |
If you design or build products, you’re probably relying on tweening more than you realize:
The throughline across all three examples is the same. Tweening is what keeps that motion from looking like an abrupt jump cut between two frames, whether the “frames” are hand-drawn cels, keyframes on a timeline, or states in a design file.
Traditional tweening, whether hand-drawn or software-interpolated, still needs an animator to define precise start and end states inside one continuous timeline, then trust the software, or a colleague, to fill in everything in between. These steps are necessary whether you’re animating a character walk cycle or a simple two-second UI transition.
An AI-native platform, like Figma Weave, takes a different approach.
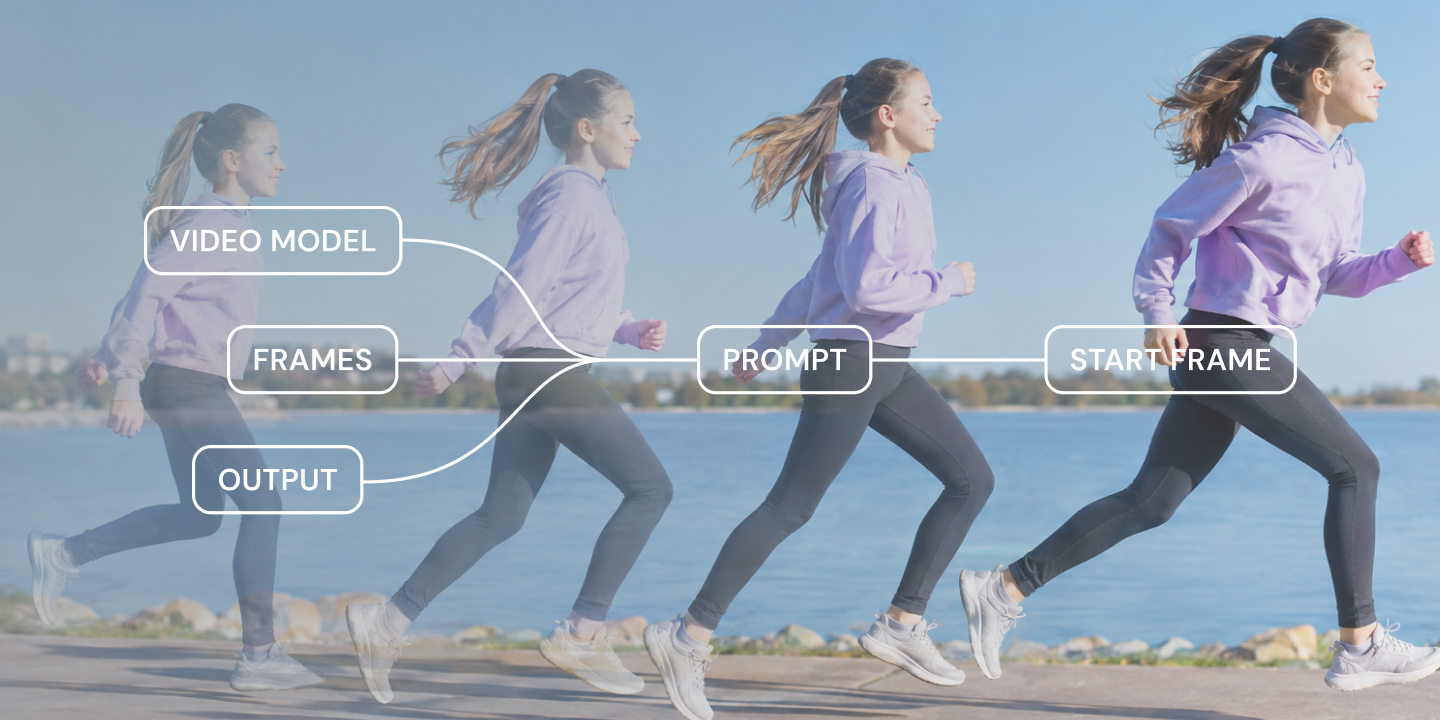
Instead of manually setting keyframes and letting software calculate the frames between them, the node-based workflows in Figma Weave let users feed a reference image—along with a prompt describing the motion or transformation you want—into an AI video-generation node. Next, the model generates the full motion in one pass.
It’s the same logic behind any generative AI workflow, where instead of specifying every intermediate step yourself, you describe the input and the outcome, and the model infers what happens between them.
This isn’t a literal tweening tool inside Figma Weave. It’s a different, AI-native way of arriving at the same goal—smooth, believable motion between a start state and an end state.
Here’s what Figma Weave tweening looks like in practice:
A prompt as simple as “camera locked, no zooms, no camera motion, gently continue the existing action” can be enough to keep a model honest about what it should and shouldn’t invent.
Some models go further. For example, Runway Aleph 2.0 lets you direct a scene frame by frame, which matters when you need to control a specific beat in a longer sequence.
Figma Weave lets you generate a few takes on the same motion prompt, compare them side by side, and pick a favorite. Instead of iterating on one version at a time in isolation, this parallel comparison turns motion into another form of prototyping where you can test several directions before you commit.
Once a workflow is producing results you like, you can save it as a reusable one-click tool so a teammate can rerun it without touching the underlying node graph. That’s especially useful when the testing process for motion ideas needs to stay inside a rapid prototyping cycle.
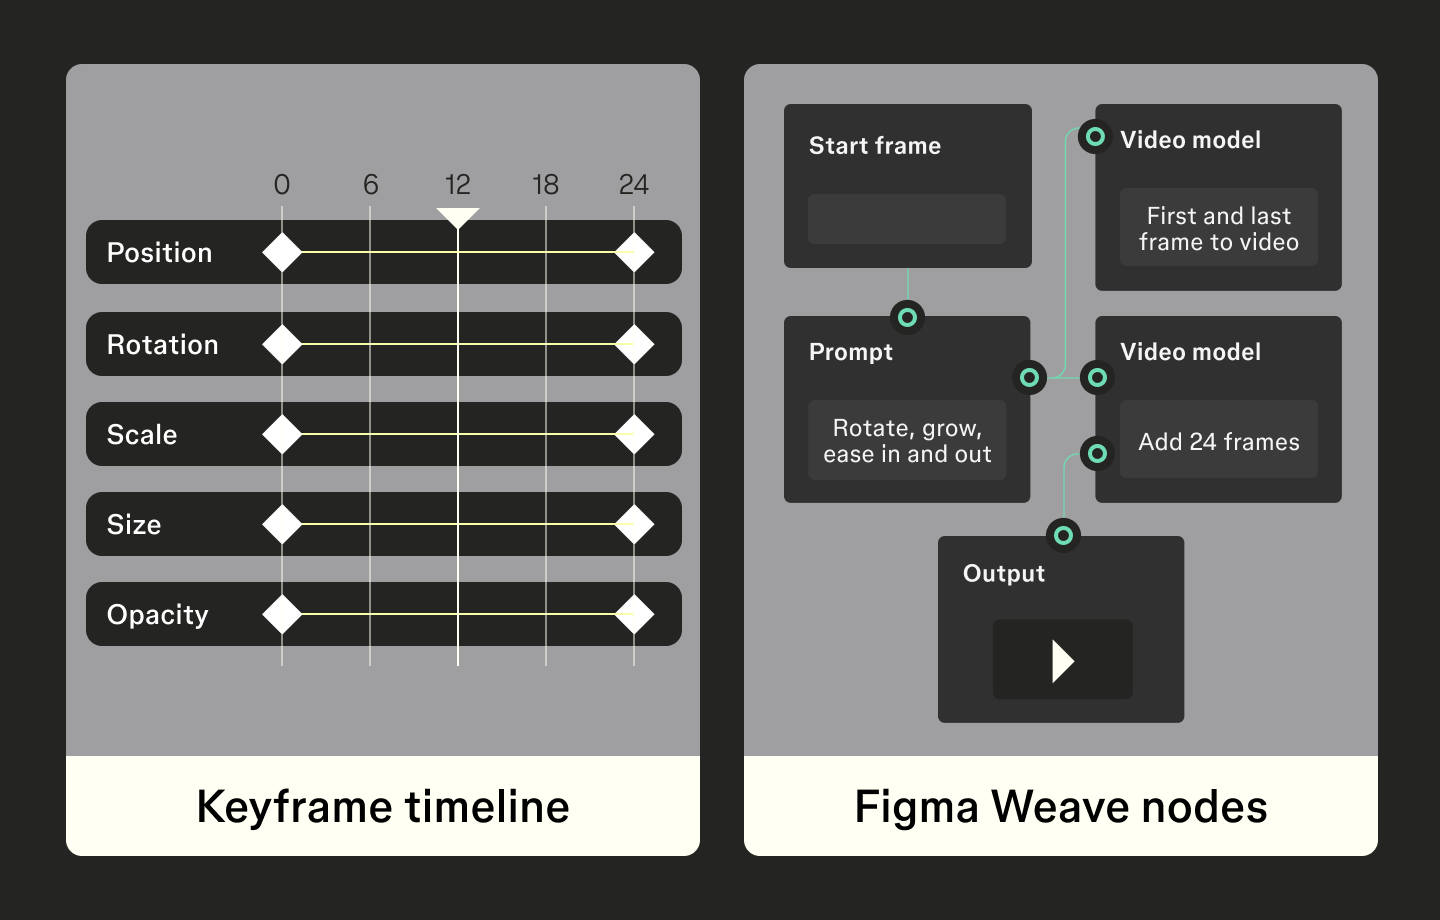
Figma Weave turns a single reference image and a prompt into AI-generated motion, without hand-plotting keyframes.
A button that slides into place when an app menu opens is a simple, everyday example of tweening. The button’s start position is one keyframe, its final position is another, and tweening generates every frame in between, so the motion reads as one continuous slide instead of an instant jump.
Tweening works in both 2D and 3D animation. In 2D, it typically interpolates position, shape, or color between two flat keyframes. In 3D, the same principle applies to an object’s position, rotation, or scale in three-dimensional space, and most 3D animation software includes its own interpolation and easing.
At minimum, a tween needs two keyframes—a start and an end. Longer or more complex animations usually string together several keyframes, with a tween filling the gap between each consecutive pair. That’s how a single motion can pass through multiple poses or states instead of just two.
Traditional software has automated basic interpolation for decades, calculating the frames between two keyframes without an animator plotting each one, but newer AI video generation tools go a step further. Instead of interpolating between two states you define, AI can generate an entire motion sequence from a single reference image and a text prompt, inferring the in-between action without calculating it mathematically.
Morphing is a specific kind of tweening where one distinct shape gradually transforms into a different one over a series of frames. Tweening is the broader term, and it also covers position, scale, rotation, opacity, and color changes that don’t involve a shape becoming something else.
Keyframing is the act of setting the start and end points. Tweening is the process that fills in what happens between them. A keyframe with nothing tweened between it and the next one is just a static pose, and a tween has no shape without keyframes to define it.
Once you can name the kind of tweening a moment calls for, choosing the right tool gets a lot simpler. Figma Weave offers an AI-native alternative to building that motion frame by frame. Add a reference image and a prompt describing the motion you want. A video-generation node handles the in-between work for you.
The broader Figma ecosystem supports a project like this, from first sketch to finished motion. Here’s how:
Figma Weave turns a reference image and a prompt into AI-generated video and motion, right alongside the rest of a design workflow.
Graphic design focuses on creating visuals to convey a message or story. Read on to learn about graphic design and how Figma can help.

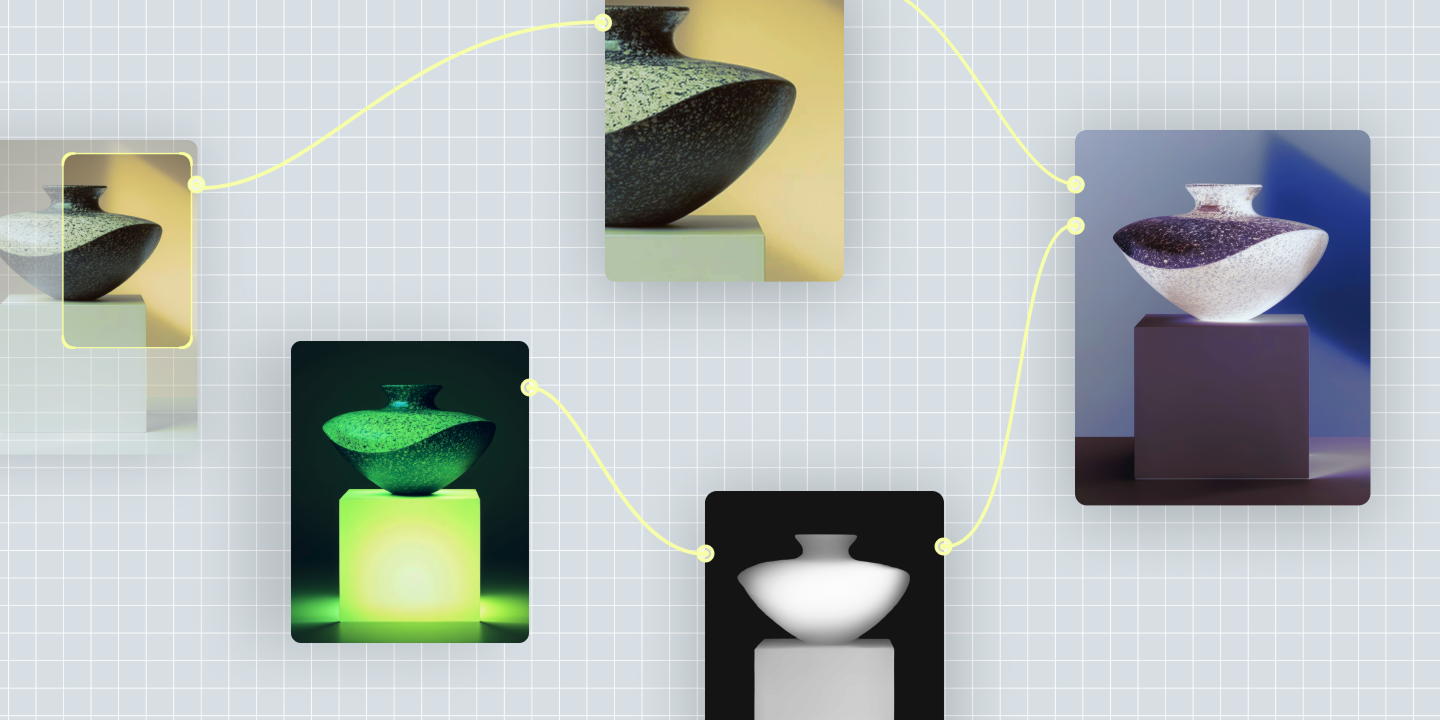
From image generators to node-based workflow platforms, here are 7 of the best AI tools for graphic design, and how each fits a real production process.

Want to stay ahead of the curve? Learn about the latest Web design trends and how to apply them in Figma to build modern, user-friendly sites.

Discover how to build an app with AI in this 7-step guide. Prototype and build apps in minutes, no coding required.

Create interactive apps faster with some of the best AI app builders. Build no-code or low-code apps with Figma Make and other AI-powered platforms.

Building an app requires research and constant iteration to meet customer needs. Learn how to design an app effectively and how Figma can help in this guide.
Build faster with Figma Weave