
Generative AI design: What it is and how to use it
Learn how generative AI is changing creative design workflows, and how teams are putting it to work with Figma Weave to generate on-brand assets at scale.
Skip to main content
Building with AI
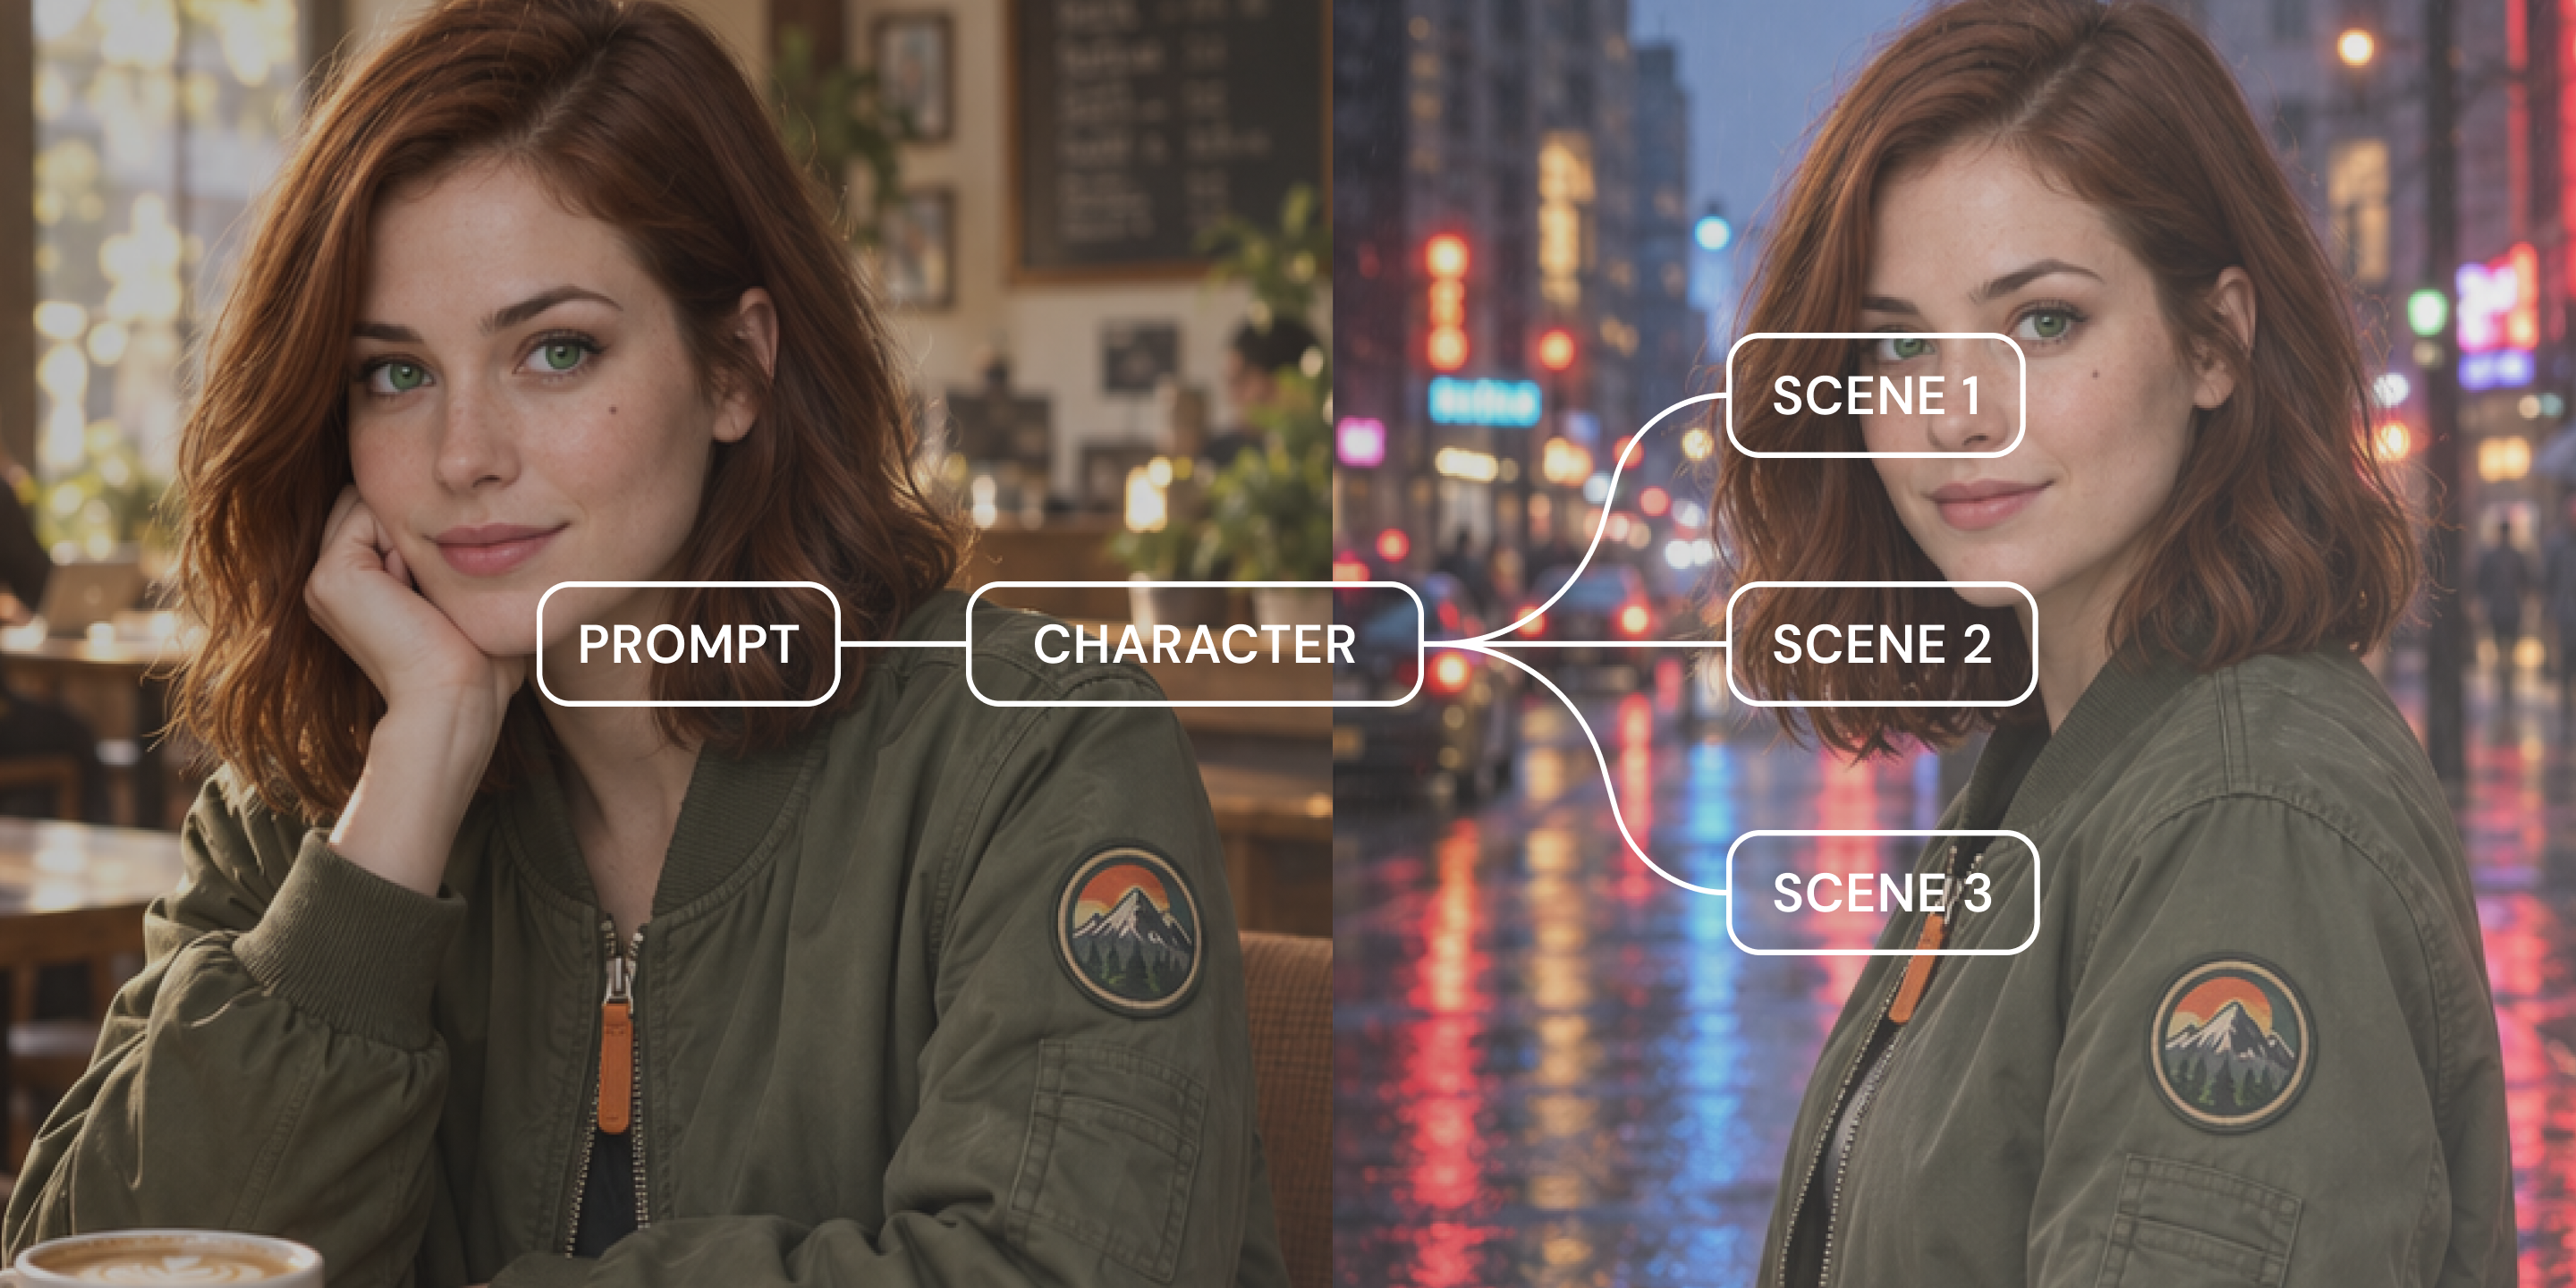
You’ve generated an AI character you love. Maybe it’s a mascot for a product launch or a recurring face for a campaign. But when you try to generate that same character in a new setting, someone else shows up onscreen. The jaw’s a little softer, and the eyes are a different hue. How do you solve this common issue?
Most advice treats AI character consistency as a prompting problem, as if a sharper description alone will keep the model on track. A good description does help, but when it’s the only thing carrying your character, every gap in the words becomes room for the model to improvise, and that’s where most drift starts. True consistency comes from the workflow you build around each generation.
Read on to learn:
AI character consistency is the ability to reproduce the same character across separate generations, scenes, and formats. This includes the facial features, build, wardrobe, and styling, down to the small details people notice when assets sit side by side. It’s the problem that consistent character AI tools and creators are trying to solve, and one of the first walls teams hit when generative AI moves from experiments into real production.
A character who looks similar across two images isn’t the same as a character who reads as the same person. Character consistency means every detail holds across multiple back-to-back campaign assets.
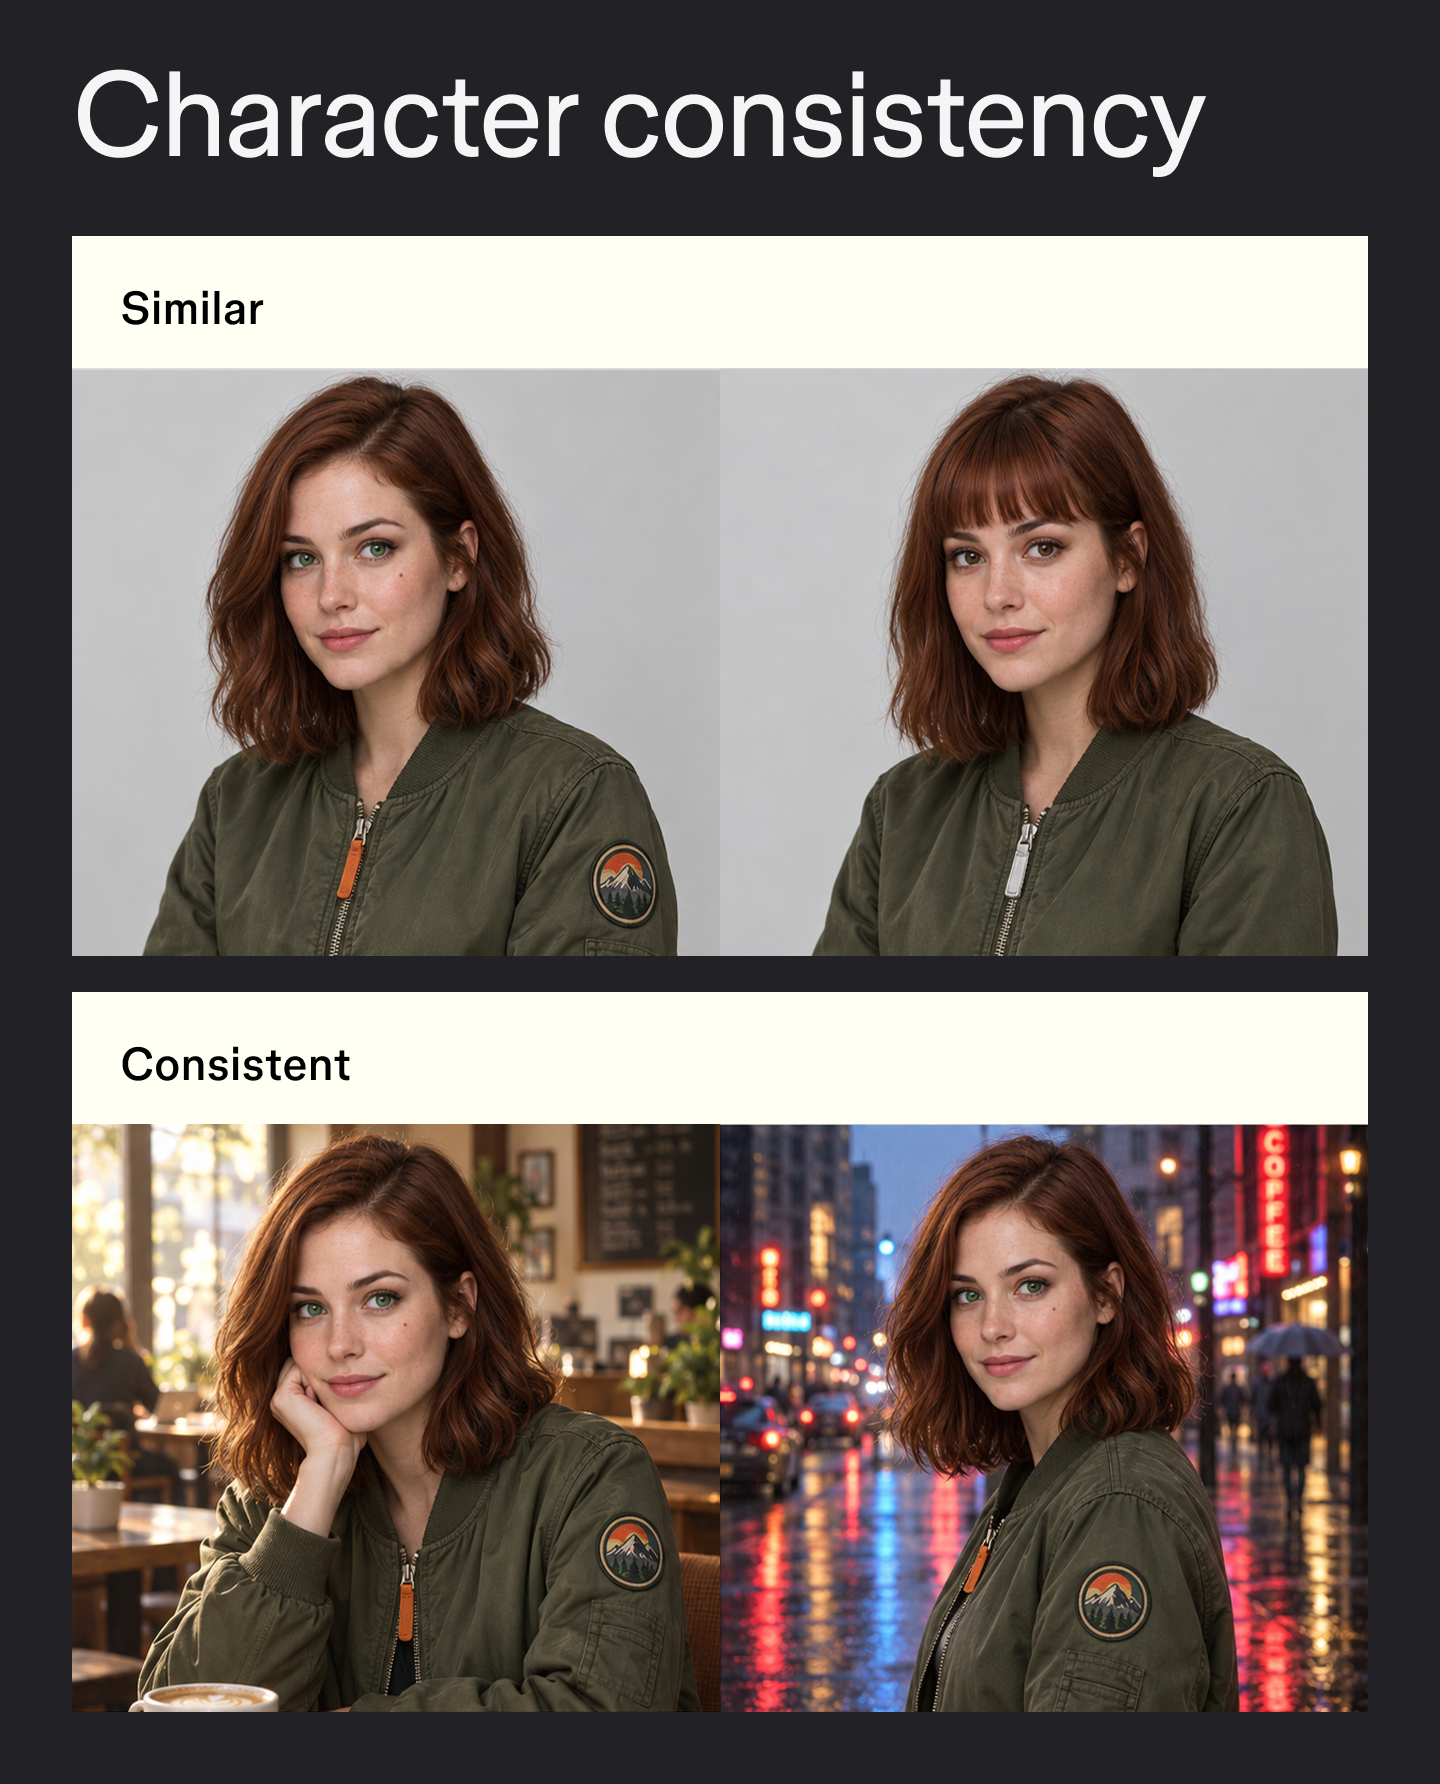
Drift usually starts small. The first image nails it. By the third, the hairstyle is off, and the eyes are a shade lighter. By the tenth, you’re looking at an entirely different character. Each change seems minor on its own, but put the images in one layout, and the character stops feeling cohesive.
Character consistency usually breaks for three reasons:
Better AI prompting helps because a tighter description narrows the range of outcomes. On its own, though, a description can’t cover everything. The model still guesses at whatever the words leave out, and those guesses change from run to run. A character that holds needs a setup that carries it forward from one generation to the next.
Figma Weave brings AI models and professional editing tools onto one node-based canvas, so your character setup lives in a workflow you can run again.
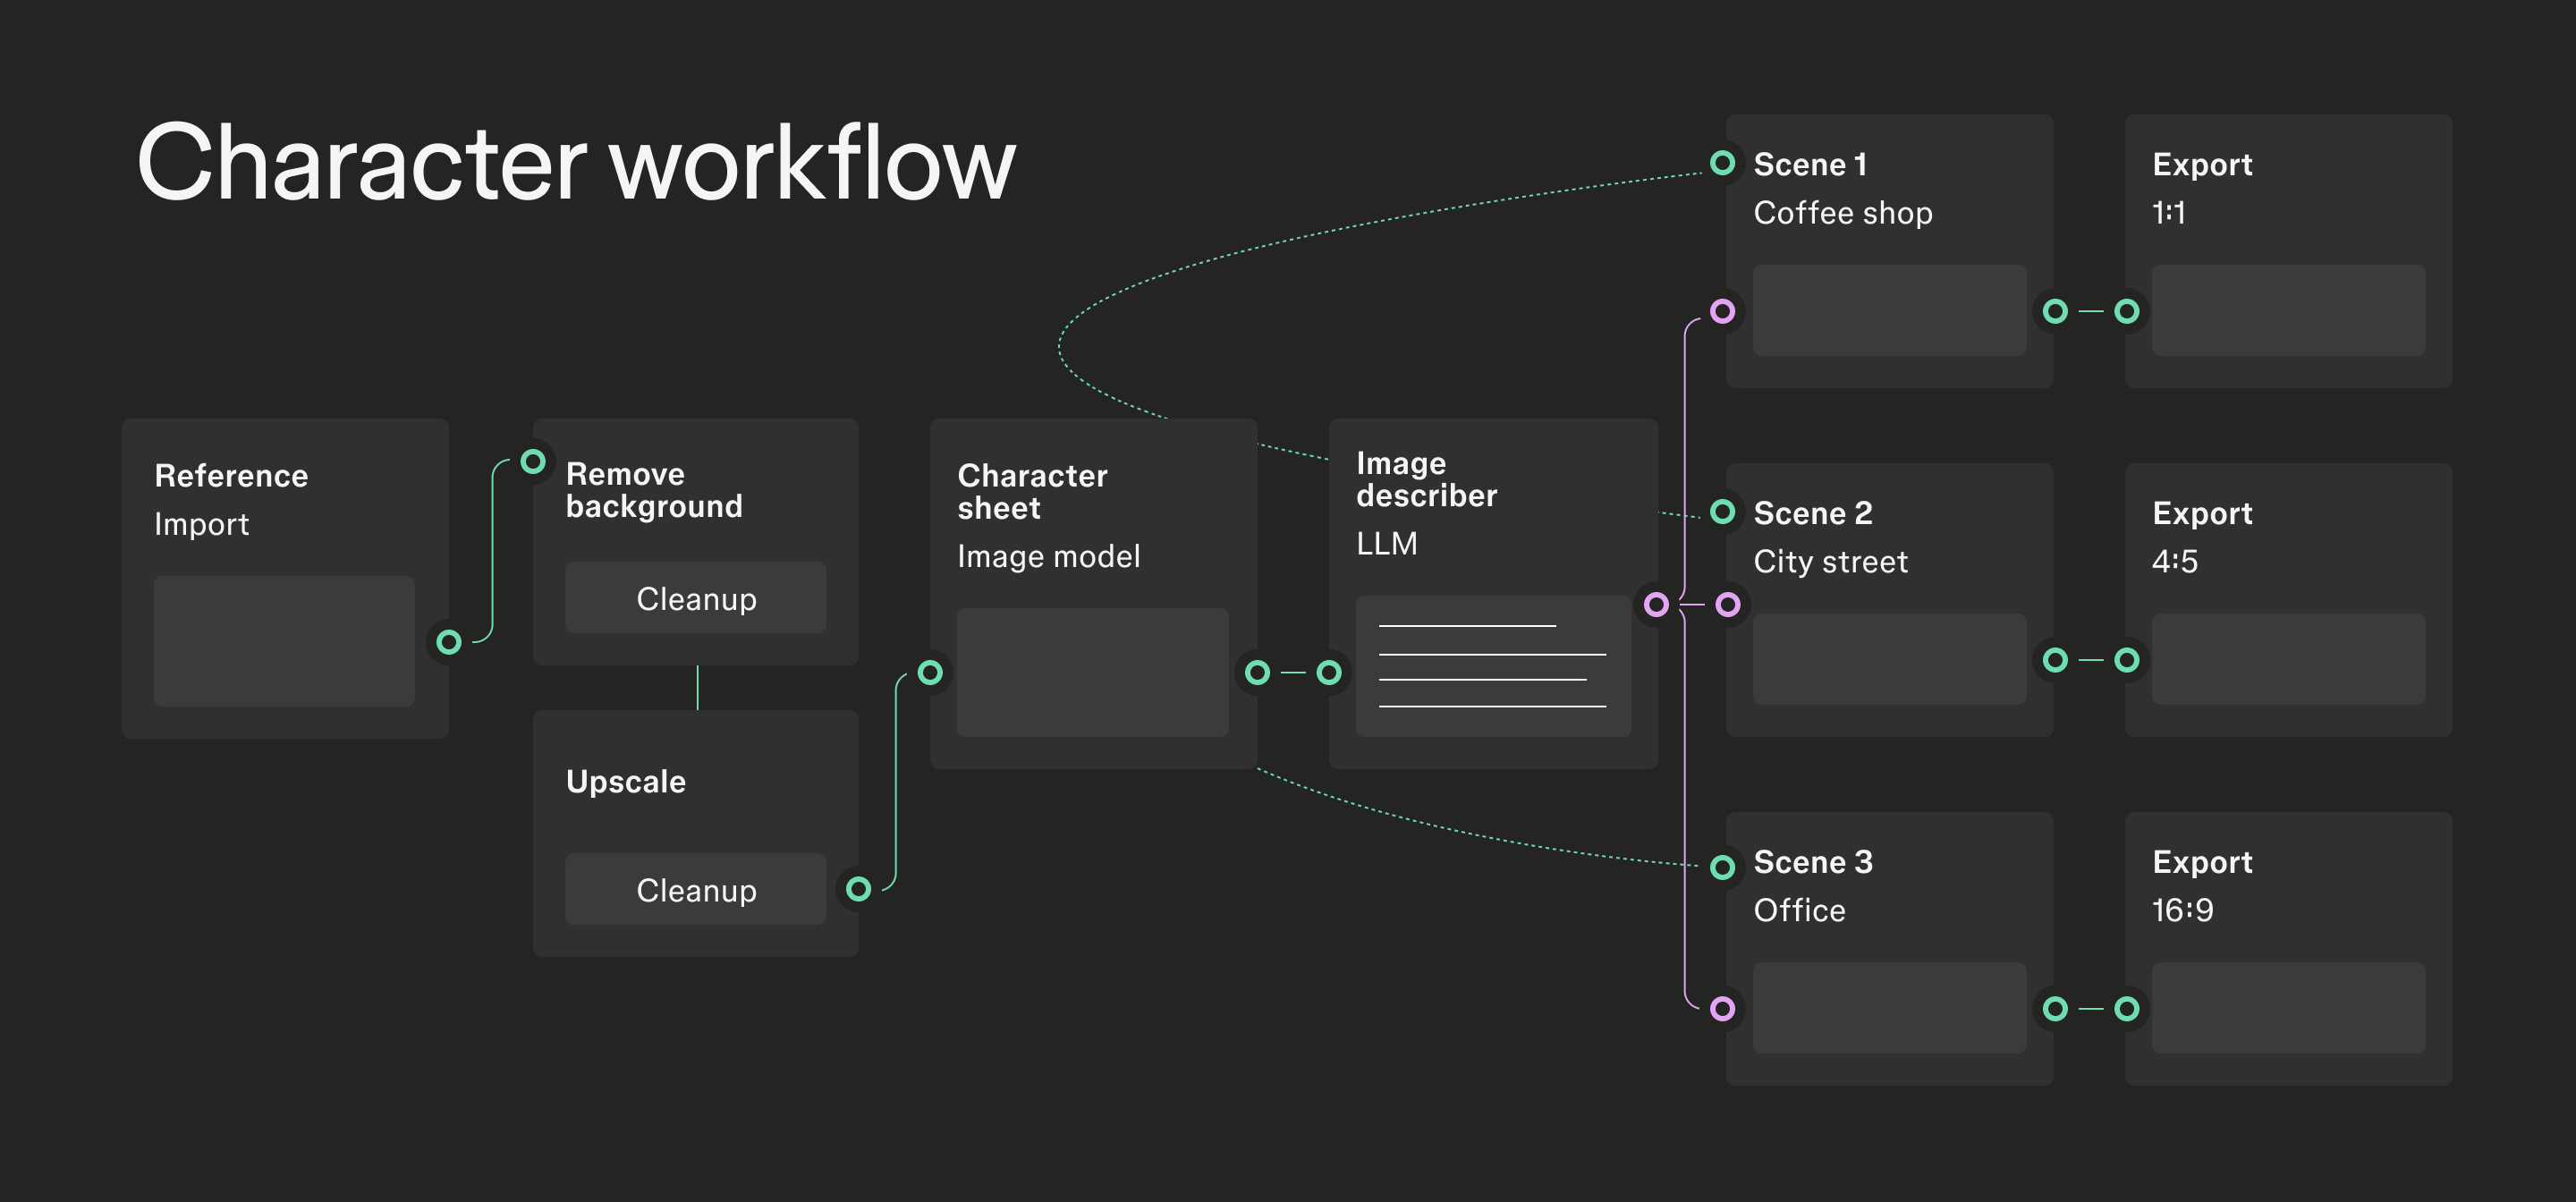
To create consistent AI characters that survive across new generations, build a character definition once and reuse it. That way, consistency becomes part of the setup. The steps below use Figma Weave workflows, where each action is a node you can see, edit, and rerun.
Your reference image influences everything downstream, so choose it carefully. Pull a few options into a mood board first, then pick the strongest one to build from. Look for even lighting and a fully visible face.
Hair across the eyes, heavy shadows, or a busy backdrop give the model more to misread, and every flaw you keep becomes part of the character. Fix these problems before you lock in the image as your source of truth.
In Figma Weave, you can place editing nodes ahead of any generation step. Use Upscale to add resolution, Crop to frame the face, Inpaint to remove a stray object or repair a detail, and Relight to even out harsh shadows. Use Mask extractor to separate the character from the background, so you’re working with a clean subject.
Most AI consistent character generator tools stop at a single image from one angle, which leaves the model guessing about what the back or sides of a character look like. A good character sheet shows the whole picture.
Turn your reference into a set of headshots with different expressions, plus a full-body view from multiple angles (known as a “turnaround”), then compose them into a single sheet. This sheet becomes the reference you check everything against.
You don’t have to build a sheet from scratch. The AI character sheet generator and the Perfect Character Sheet Community workflow are ready to open and run with your own reference.
Next, translate the character sheet into words. In Figma Weave, the Image describer node analyzes an image and pulls its key visual attributes into an editable written description. Run your character sheet through it, and you’ll get a detailed breakdown of face shape, hair, skin tone, wardrobe, and styling.
That output is the real asset. Remember that a description on its own is what lets drift creep in. This step fixes that in two ways:
First, the Image describer writes the description from your approved character sheet, so it picks up details you might not think to spell out yourself, like the shape of the brow or how a collar sits.
Second, you never send that description alone. You can tighten it into a master character prompt with an Any LLM node, then pair it with the character sheet as an image reference each time you generate. The image covers whatever the words miss.
From there, you can still edit the text. If the describer calls the jacket “dark blue” and you want “navy wool,” change it once, and every future generation picks it up. Diligent prompt engineering pays off in this step because you’re refining a description grounded in a real image and reusing that exact text on every run.
Keep your character inputs (the sheet and the description) fixed, and change only the scene prompt. That holds the character steady. A new setting can still shift the lighting and rendering enough to change how a face and fabric read, though, so keep those variables on a short leash.
Add a few fixed style terms to your character prompt, like your lens and rendering choices, and carry them into every scene. Change one thing at a time.
Pro tip: If a scene calls for dramatic light, try generating the character in neutral light first and adjusting it afterward with the Relight node. That way, the model isn’t reinterpreting the face and the lighting in the same pass.
Because the character inputs never change, every generation starts from the same point. It’s worth running a few models side by side on the same inputs, too. Some models hold faces and other characteristics better than others, so it’s worth running a few side by side and comparing their outputs on one canvas in Figma Weave.
Some generations will nail the scene and get the character slightly wrong. If this happens, skip the full rerun. Mask the part that drifted and regenerate just that area with Inpaint, or use the Compositor node to layer the correct character into the scene.
Once a generation gets the scene and character right, use the same workflow to output each aspect ratio you need from that one image, like 1:1 for feeds and 9:16 for stories. Each new size comes from the same approved image, not a new generation.
Video raises the stakes, since every frame is another chance to drift. The most reliable AI video character consistency workflow starts with stills. Generate and approve keyframes of your character first, then animate those frames in short shots.
Long single generations tend to accumulate drift. Short clips anchored to approved stills keep the character and background on-model.
The consistent characters in Seedance 2 Community workflow shows this in action. It uses ByteDance’s Seedance 2 video model to carry a reference character across shots.
Pro tip: Video models change fast, so check which ones are available in Figma Weave before you build.
You’ve built a character you’re happy with—but keeping it consistent when multiple designers, marketers, and freelancers are all generating assets is a different challenge.
Here are some habits that help your character hold up across a full campaign:
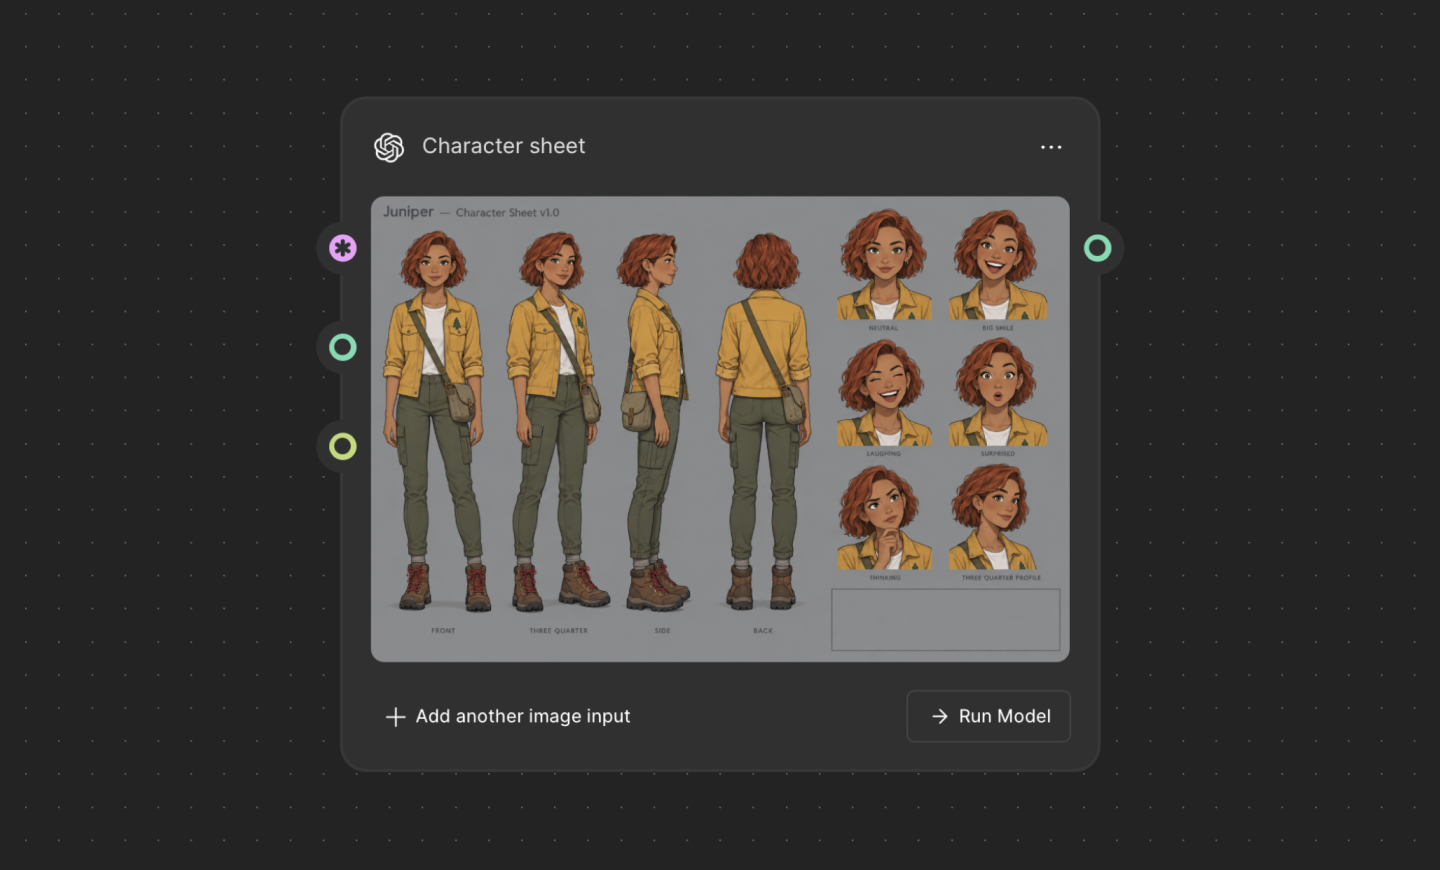
Each model interprets the same inputs a little differently, so a character won’t come out identical from one model to the next. Carrying your character sheet and written description into every model gets you close, and running models side by side makes it easy to spot which one holds your character best.
Vague descriptions, models that don’t remember previous generations, and scene changes with shifting lighting can all interfere with character consistency. Small errors can compound quickly, so always compare each new image against the original reference.
To maintain character consistency, start with approved stills, or keyframes, of the character, then animate them in short shots. Long generations are subject to drift, while shorter clips anchored to approved frames are more likely to keep the face, wardrobe, and background steady across a sequence.
Plenty of image and video tools now offer reference-based features for improved design consistency. Video models like Kling and Seedance accept reference images to carry a character across shots. Most character consistency AI tools work inside a single model, though. The AI consistent character generator in Figma Weave lets you run several models on one canvas alongside editing nodes, so you can build a character workflow once and reuse it across models.
AI character consistency comes down to setup. A clean character sheet with multiangle turnaround and a reusable description gives every generation the same starting point, while a saved workflow lets your whole team produce on-model assets. Figma Weave puts generation and editing on one canvas, so you can build once and keep coming back.
Here’s how to connect this workflow with the wider Figma ecosystem:
Figma Weave brings AI generation and professional editing tools onto one canvas.
Learn how generative AI is changing creative design workflows, and how teams are putting it to work with Figma Weave to generate on-brand assets at scale.

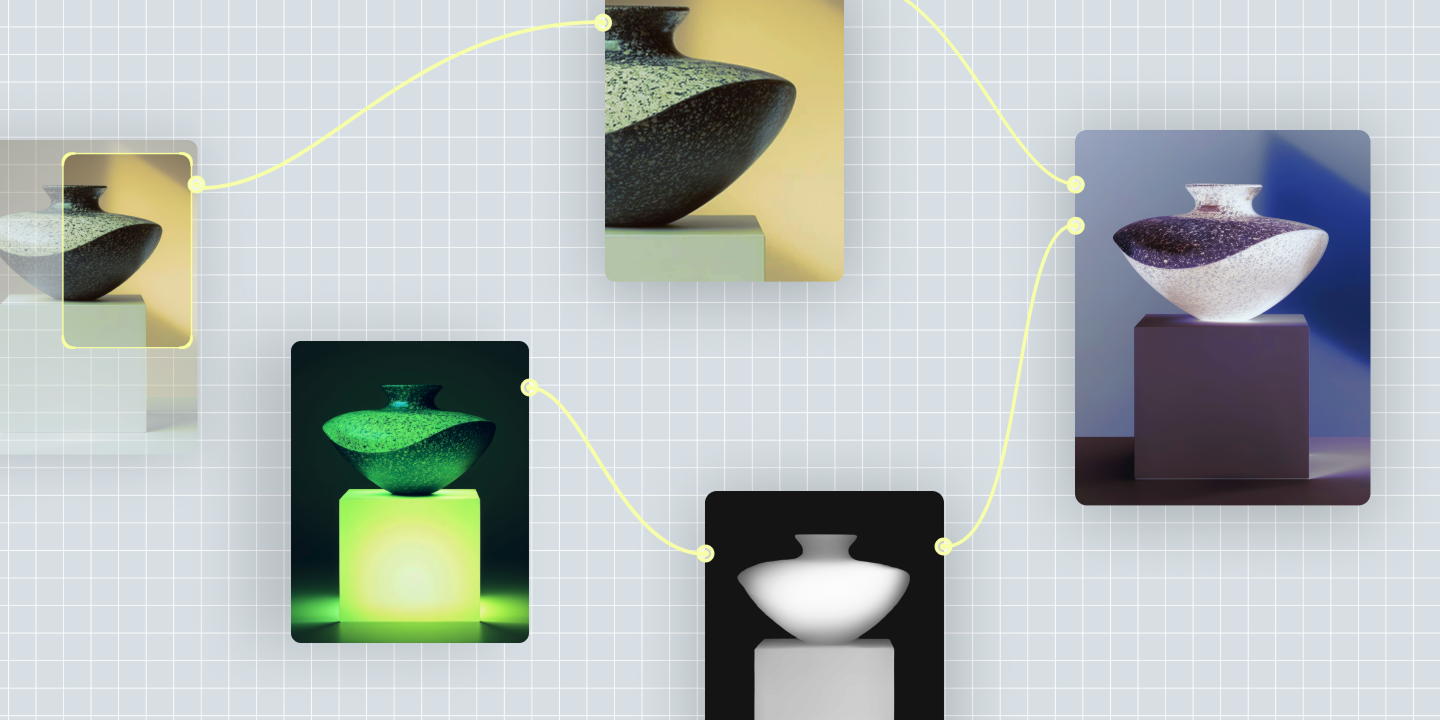
From image generators to node-based workflow platforms, here are 7 of the best AI tools for graphic design, and how each fits a real production process.

Learn what visual prompt engineering means, how it differs from text-only prompting, and how to write a prompt that gets AI tools closer to your intended design.

Get better output from your AI design prompts. Learn practical tips, examples, and mistakes to avoid, plus how Figma helps keep results consistent.

The AI creative process has shifted from idea generation to curation. Learn how product teams use Figma to ideate, refine, and align on the best direction.

Find some of the best AI design tools for 2026. Compare tool capabilities and benefits to streamline your design process and boost your creativity.
Build faster with Figma Weave