
What is graphic design?
Graphic design focuses on creating visuals to convey a message or story. Read on to learn about graphic design and how Figma can help.
Skip to main content
Design basics
Unify logos, colors, and messaging in Figma.
You stop mid-scroll at a scarf lifting in the wind. The same few seconds loop over and over. Everything else in the shot stays perfectly still. It’s that one moving detail that catches your eye. And that’s called a cinemagraph.
This attention-grabbing effect has made cinemagraphs a go-to for social and marketing content. But while a well-made one mesmerizes, a poorly made one just looks off—and people notice fast. That’s likely why 58% of designers in the Figma State of the Designer 2026 report still rank visual design and polish as the most in-demand skills in the field.
Read on to learn:
A cinemagraph is a photograph where almost nothing moves, except for one detail caught in a smooth loop—a technique photographers Kevin Burg and Jamie Beck coined in 2011.
During New York Fashion Week, they blended fashion photography with looping videos to give still images subtle movement. The name stuck, and the format has grown more popular since.
Content teams that build eye-catching campaign visuals often use motion design, such as cinemagraphs, in digital ads and social posts. A few seconds of motion hold attention longer than a static image and cost much less to produce than a full shoot.
Not every loop works the same way. A bounce loop plays forward, then reverses to the start. It smooths the transition, but it can feel slightly mechanical. A repeat loop plays forward and cuts straight back to the first frame, which looks more natural if the motion lines up cleanly at both ends.
Most cinemagraphs export as MP4 or WebM files. You’ll still see cinemagraph GIFs sometimes, though that format tends to lose quality and increase file size.
A cinemagraph moves in one region while the rest of the frame stays frozen. Since less of the frame is animated, it tends to export as a smaller file than a full GIF or video. Modern formats like MP4 and WebM are good at compressing that limited motion.
A GIF loops its entire frame, background and all, which is why file sizes climb fast once the image is in motion. A video plays a story from start to finish, whether that’s 10 seconds or 10 minutes, and it’s built to be watched once.
| Format | How it moves | Ideal for |
|---|---|---|
| Cinemagraph | Moves in one region while the frame stays frozen | Ads, hero images, product shots, social |
| GIF | Loops the entire frame | Quick reactions, casual shares |
| Video | Plays start to finish and doesn’t loop | Telling a longer story |
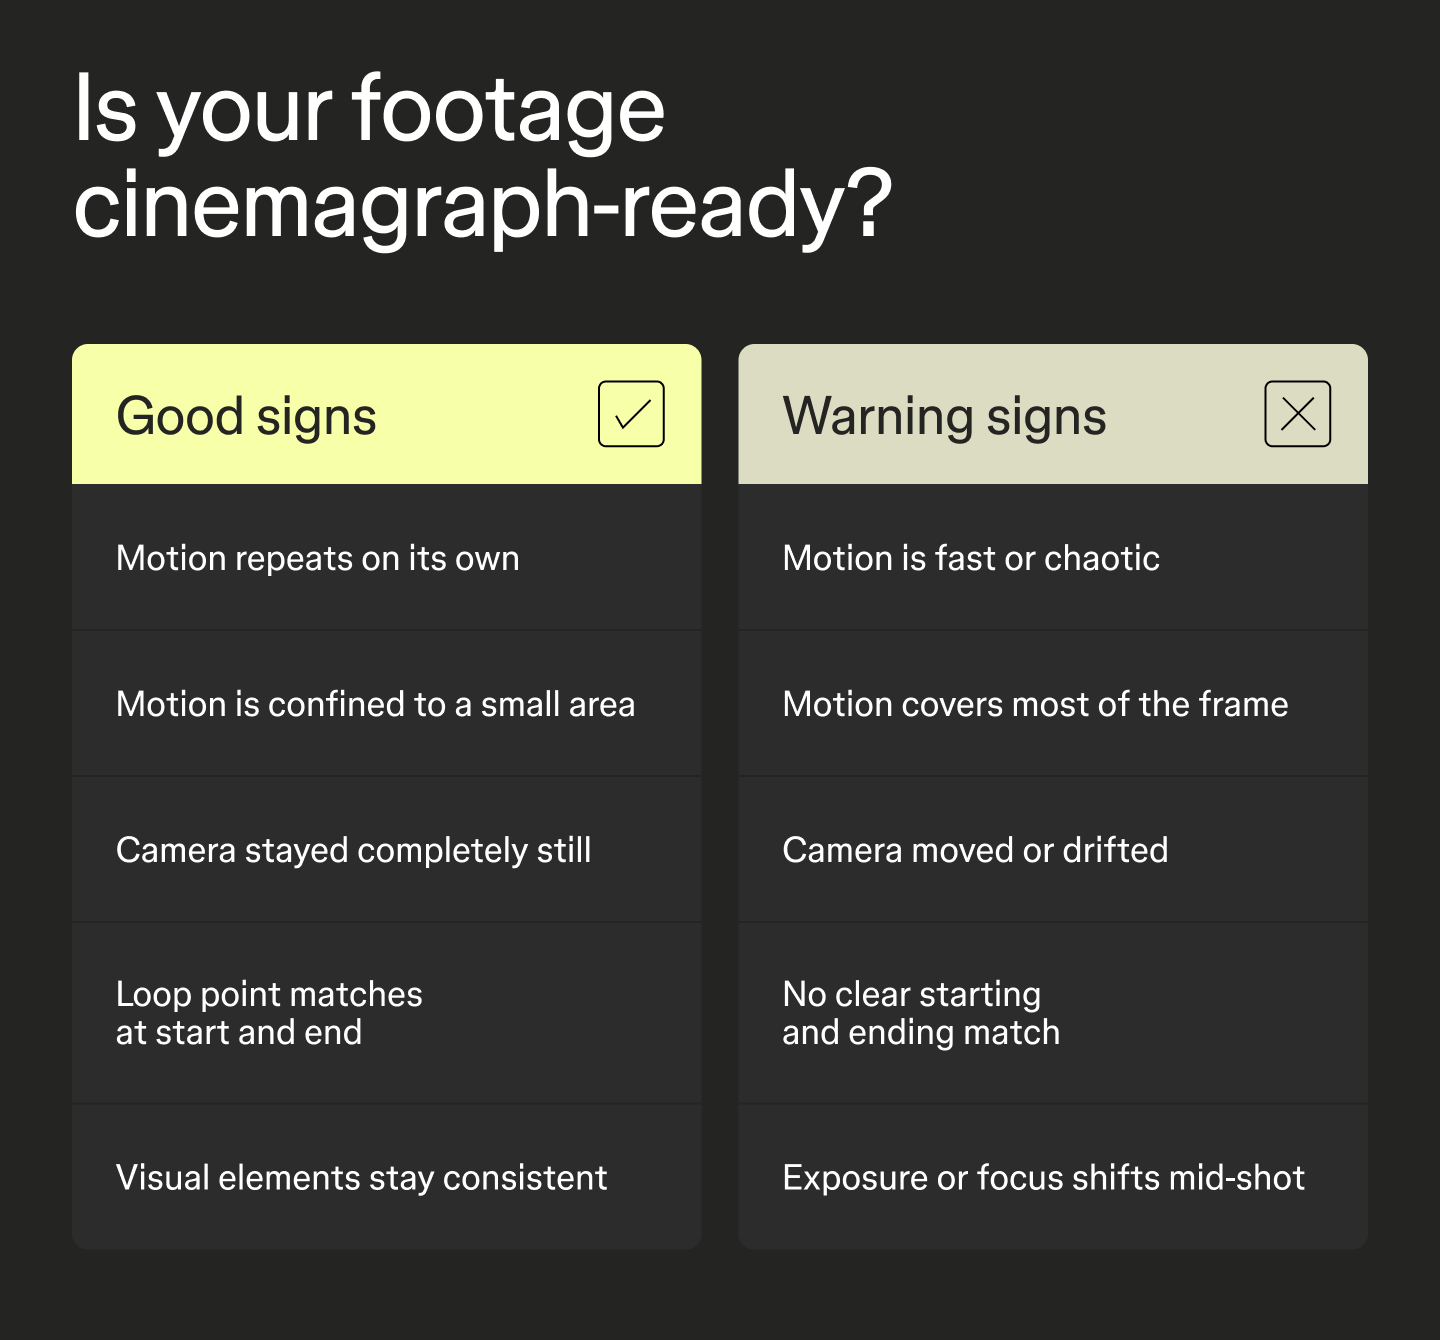
Good cinemagraph footage follows best practices in visual composition and focuses on a single motion that repeats cleanly on its own. A flickering flame loops naturally because the motion doesn’t have a clear start or end.
Here are some common cinemagraph examples:
Not all footage works, though. If you shoot a scene with fast, chaotic motion, like a busy crowd or leaves scattering in the wind, you won’t get a clean loop since there’s no single repeatable moment to isolate. And handheld footage without a stabilized shot will show the whole frame drifting.
Shoot with a phone on a tripod or braced against something solid, so the only thing moving in the frame is the detail you want to highlight.
Once you’ve found a motion you want to isolate, the next phase is to capture it and turn it into a loop. Here are five steps for making a smooth cinemagraph.
A lot of people assume you can turn any still photo into a cinemagraph, but a photo alone doesn’t give you any motion to work with. If you’re trying to make a cinemagraph from a still image, you’ll need to go back and shoot a short video clip of that same scene with your chosen motion.
Shoot with a locked-off camera, which just means your camera doesn’t move at all while you’re recording. Set your phone on a tripod or brace it against a table or a wall, so nothing shifts. If the camera drifts even slightly, the whole frame will look shaky once you try to freeze the background later.
Once you’re set up, record 5–10 seconds of continuous motion. Let the motion happen naturally while the camera stays still.
Pro tip: Figma Weave can generate motion from a photo for you if you’d rather skip the shoot.
Go through your clip and look for a moment where the motion lines up with itself. The position and direction of the movement in the first frame should roughly match those in the last frame. That’s your loop point. For instance, a candle flame that leans left at both ends of the clip will loop more smoothly than one that leans left at the start and right at the end.
This is the step most beginners rush through, and it shows later. A loop point that’s slightly off will create a visible jump every time the video repeats. Take a few extra minutes here to avoid having to redo any steps later.
Pro tip: Play the clip at half speed while you scrub. Small mismatches at the loop point are much easier to catch when the motion isn’t too fast to see.
Pull one frame from your clip to use as the frozen background. This becomes the “photo” half of the effect—the part of the image that never moves. Export it as a PNG rather than a JPEG. PNG is lossless, so you keep the exact detail and color from your original footage.
Pro tip: If your editing tool defaults to JPEG, double-check the export settings. Some tools bury the PNG option under “advanced” or “custom” export.
Next, combine your still frame and video clip into a single file, layering the video beneath the still frame. Most editing tools handle this with a mask, a layer that hides part of an image so that what’s underneath it shows through. Paint or draw that mask only over the region you want moving, whether that’s the steam or the water. Everywhere else, the still frame stays on top, blocking the video underneath.
Feather the edges of the mask once it’s in place so the boundary blends rather than cuts off sharply. A hard edge around the moving area creates a visible box or outline once the video plays, which is one of the most common giveaways of an amateur cinemagraph.
Pro tip: The Figma Weave Mask extractor and Mask by text tools can isolate the motion area automatically if hand-painting a mask feels tedious.
Before you export anything, play your file back on a loop and watch it a few times through. This is where you’ll catch what you missed during masking, such as small jumps or flickers right at the point where the clip repeats. The final result should be two to five seconds long.
Once it plays cleanly, export as an MP4 or WebM. Both formats hold more color than GIFs, which cap out at a much more limited range. This can introduce visible banding in anything with smooth gradients.
Pro tip: Watch the loop on a phone screen, not just your editing software’s preview window. Color banding and seams are often more visible at smaller sizes and higher brightness.
You can build a reusable cinemagraph process with Figma Weave, no shooting needed. AI tools generate the motion and mask it for you.
Connect an image-to-video model, like Kling, Runway, or Luma, to your photo, and the AI model generates the motion on its own. A masking node isolates that motion to one region. Use Figma Weave to apply the mask automatically instead of painting one by hand, with tools such as Mask Extractor and Mask by Text. Chain an image-to-video model node with a masking node, and you’ve got a workflow instead of a one-off edit.
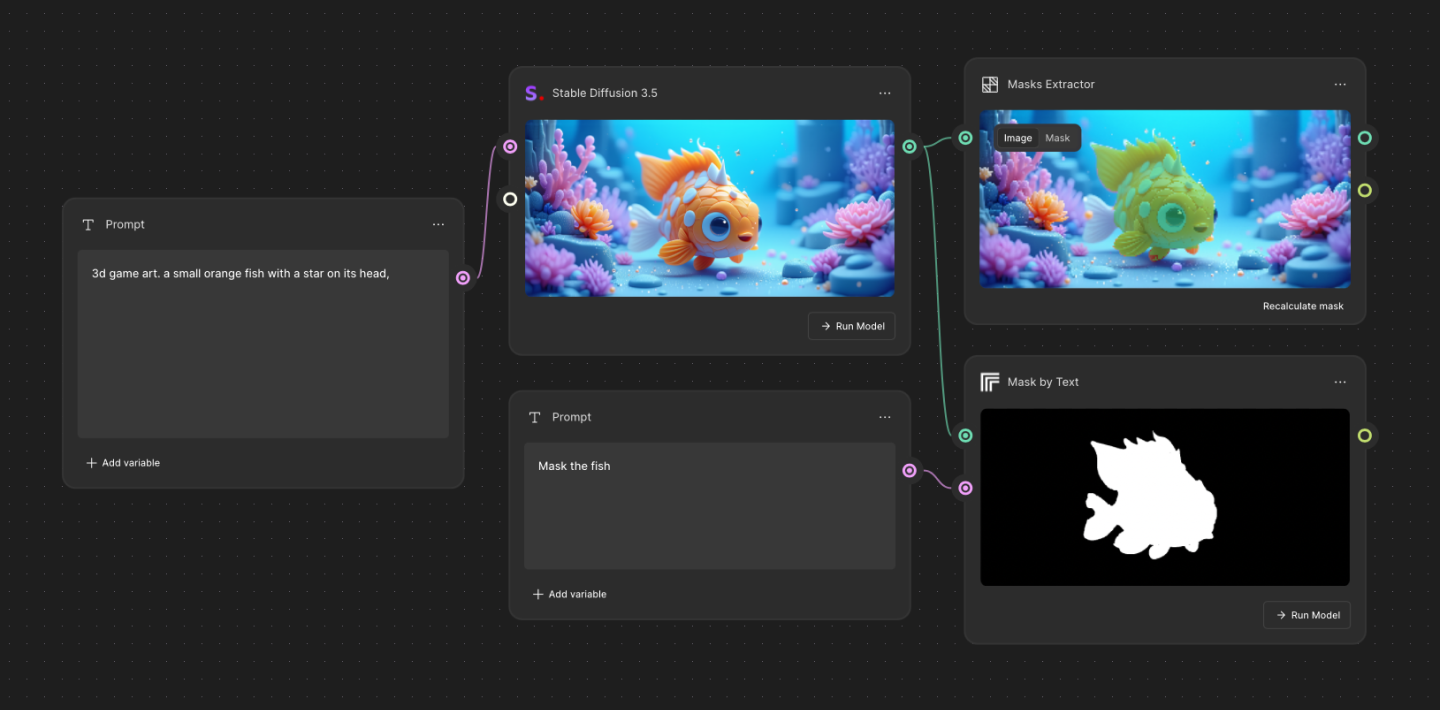
Run the same Figma Weave workflow against a new photo, and the tool applies that masked-motion logic automatically, with no need to rebuild the chain from scratch or relearn steps.
Connect AI models and editing tools on a single canvas to create a cinemagraph workflow.
Not exactly. A cinemagraph can be saved as a .gif file, but the term GIF usually refers to a clip in which the whole frame loops. Only one region moves in a cinemagraph, and everything else stays frozen, no matter which file format you save it as.
Yes. Some phone apps and browser-based tools offer built-in cinemagraph maker effects, while node-based platforms like Figma Weave let you build the motion and masking into a reusable workflow.
Most cinemagraphs run two to five seconds before repeating. Longer loops make it harder to hide the seam where the motion repeats.
It depends on the tool. Some phone apps and browser-based editors offer free cinemagraph effects, while professional editing software or AI platforms may require a subscription or sell usage-based credits.
A cinemagraph always comes down to the same goal—one region moves, everything else stays still. You can get there by manually masking a clip you’ve shot, or letting a model generate the motion and automatically apply a mask for you. With Figma Weave, you can build that into a reusable process that turns any new photo into a cinemagraph for your campaigns.
Here’s how to bring the rest of your workflow together:
Figma Weave handles video generation and masking, so picking the right footage is all that’s left.
Graphic design focuses on creating visuals to convey a message or story. Read on to learn about graphic design and how Figma can help.

Learn the 13 core graphic design principles, how to apply them, and how Figma can help elevate your designs in this guide.

Pairing the right colors together creates harmony in UI designs. Learn 100 color combinations for your next project and how Figma can help.

UX design is the creation of digital products around user needs and expectations. Learn key principles, skills, and how to use Figma for UX design.

UI design starts with a clear understanding of best practices. Learn the seven essential UI design principles and how to apply them in this guide.

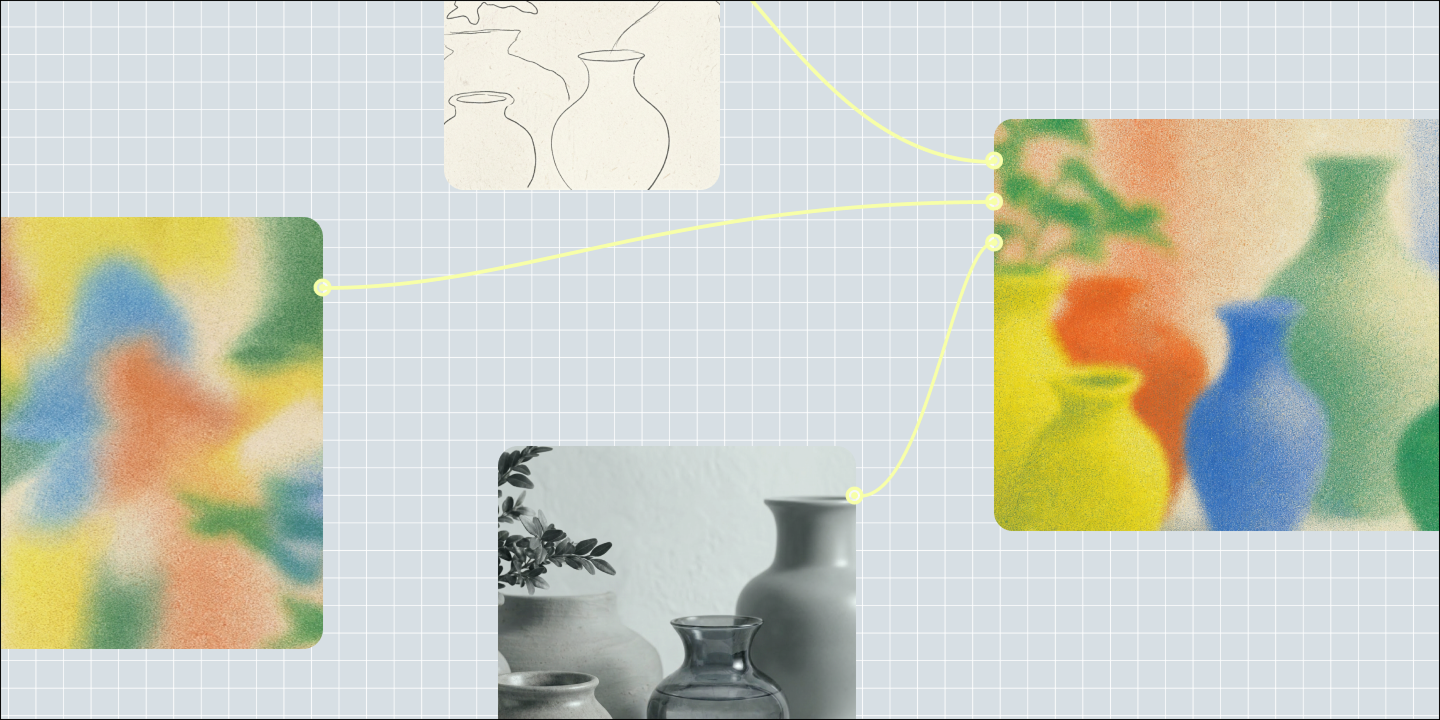
Learn how generative AI is changing creative design workflows, and how teams are putting it to work with Figma Weave to generate on-brand assets at scale.
Build faster with Figma Weave